Showing posts with label Pieter Bruegel the Elder. Show all posts

Monday, March 30, 2020

Here, Near, and Far. At Home Learning.

Artists are like magicians. They can create the illusion of depth and space in a painting or drawing by following a few tricks.

Trick #1. Artists create three areas of space; HERE, NEAR, and FAR. Objects that are HERE are found in the Foreground. Foreground is the area of space closest to you in a painting or drawing. FAR is considered the background. Objects are smaller in this area of space as this is the space farthest from you. As objects get further away, they appear to get smaller. 


Trick #2. Artists make objects in the foreground larger than objects in the middle ground or background. Notice the flowers in the picture below. They are larger in the foreground. As the flowers get further away, they become smaller and smaller.

Trick #3. As objects get further away, not only do they get smaller, but they get higher on the picture plane (paper). The largest flowers, found in the foreground, are at the bottom of the picture, while the flowers in the background, are closer to the top of the picture.

Trick #4. Artists overlap shapes to give the illusion that one shape is in front of another, which means that the object on top is closer. Notice the two flowers below. One flower is drawn on top of another flower to give the "illusion" that it is closer and in front.
Trick #5. Objects in the foreground have more details, than objects in the middle ground and backgrounds. 

If we look at the painting below by Pieter Bruegel the Elder, notice he used some of these same tricks to create the illusion of space.  The harvesters at the bottom of the picture are closest to us.  We can clearly see  their clothes, faces, and even the lunch they are eating. Their size is bigger than the harvesters in the middle ground and background of the painting.
The Harvesters is a Northern Renaissance oil painting created by Pieter Bruegel 
the Elder in 1565. It lives at the Metropolitan Museum of Art in New York.
As the people recede in space or get further away, their size gets smaller. We can't see as many details, and they get higher on the paper. Notice the women walking away on the path in the wheat field. They are much smaller than the people in the front of the picture in the foreground (at the bottom of the picture).

Orchard Bordered by Cypresses (1888) by Vincent Van Gogh

In Vincent Van Gogh's painting above, notice he also uses some of the same tricks as Pieter Bruegel the Elder.

Trick #1. He created three areas of space; Here (foreground), Near (middle ground), and Far (background). The grass and hut are in the foreground. The orchard is located in the middle ground and the Cypress trees are located in the background.

Trick #2. (Relative Size) Van Gogh painted the trees closest to us much larger than the trees further in the distance. The trees in the background are much smaller. As the path recedes in space or gets further away, it also gets smaller and smaller.

Trick #3. (Location on the paper) The cypress trees in the background are not only further away, but higher in the painting than the grass and path at the bottom of the picture found in the foreground.

Trick #4. (overlapping) Van Gogh overlapped the orchard trees to give the illusion that one tree, the largest tree, is in front and closest to us.

Trick #5. (details) We can see the leaves and branches more clearly on the trees closest to us than the trees further away. The farthest trees have the least amount of details.

The Gleaners by Jean-Francois Millet in 1857. It lives in the Musee d'Orsay in Paris.  
Close-up of the background from the Gleaners.
Try to use some of these same tricks in your own art making!

If you wish to learn more about Pieter Bruegel the Elder, watch the episode of Mati and Dada as they travel back in time and meet the artist in person.


Monday, February 20, 2017

Landscape Newscasts

I finally finished loading all the green screen landscape news reports to four movies, one movie for each 2nd grade section. Students are so excited to finally have their videos on YouTube. For this project, students were divided into groups of four to five students, together they were assigned one landscape from two artists; Grant Wood or Peiter Bruegel the Elder, and wrote a script before recording their video. Their script needed to include the following descriptions; horizon line, foreground, middle ground, background, overlapping, placement, size, and value. See my previous post explaining this project.

2A Landscape News

2B Landscape News

2C Landscape News

2D Landscape News

Wednesday, January 18, 2017

Breaking News: It's all in the Landscape!

Second graders are using DoInk's Green Screen iPad app to create a news report on art vocabulary relating to space (the design element in art not the physical universe beyond the earth's atmosphere). Students examined landscapes from two artists; Pieter Bruegel the Elder (Netherlands) and Grant Wood (Iowa). Students are working in small groups to create their news report. 


First step, examine a landscape painted by Grant Wood or Pieter Bruegel from one of the landscapes below. Step two, develop a skit and designate speaking parts as they would see in Reader's Theatre by writing Character’s Name, then colon or dash and finally speaking part. In the script, students must include the following art vocabulary; foreground, middle ground, background, overlapping, value, size, placement, and horizon line. Students must include the artist's name and year painted. 
Pieter Bruegel the Elder, Winter Landscape with a Bird Trap 1565
Grant Wood, Young Corn 1931
Grant Wood, New Road 1939
Grant Wood, Fall Plowing 1931
Pieter Bruegel the Elder, The Harvesters 1565
We also discussed how every great story needs a beginning, middle and end. Once groups have completed their scripts and assigned a camera person, their group may begin filming with the iPad using the DoInk Green Screen App. The landscape assigned to that group will be displayed behind the "Newscasters" onto the green screen as they point out the important information and vocabulary the group discovered while writing their script.
Script Checklist

Tuesday, April 21, 2015

News Report on Landscapes (continued)

I finally finished loading all the green screen landscape news reports to one movie. Students are so excited to finally have their videos on YouTube. For this project, students were divided into groups of 2 to 3 students, together they chose one landscape from two artists; Grant Wood or Peiter Bruegel, and wrote a script before recording their video. Their script needed to include the following descriptions; horizon line, foreground, middle ground, and background. We used the following planning sheet to write our scripts. See my previous post explaining this project.

My students really enjoyed this project, because they were the ones in charge and of course, because they made a movie! I hope you enjoy it as much as we did making it.

Monday, March 2, 2015

News Report on the use of space in a landscape

Second graders are using DoInk's Green Screen iPad app to create a news report on art vocabulary relating to space. Fall Semester, students examined two landscapes; Pieter Bruegel the Elder's "Hunters in the Snow" and Grant Wood's "Stone City, Iowa". Students are working in small groups to create their news report. First step, choose a landscape painted by Grant Wood or Pieter Bruegel from the landscapes below. Step two, develop a skit and designate speaking parts by writing Character’s Name, then colon or dash and finally speaking part. In the script, students must include the following art vocabulary; foreground, middle ground, background, and horizon line. Students must include the artist's name and year painted.
Pieter Bruegel
The Harvesters 1565

Pieter Bruegel
Landscape with the Parable of the Sower 1557

Pieter BruegelWinter Landscape with a Bird Trap 1565
Grant Wood Young Corn 1931

Grant Wood Near Sundown 1933

Grant Wood New Road 1939

Tuesday, November 18, 2014

Adding Trees to our Winter Landscapes

After reviewing the little tricks artists use to create the "illusion of space", students in first and second grades started painting their trees on their snowy landscapes. Many of the tricks these students were using included changing the size of the trees, the trees became smaller as it receded in space. Students also changed the value of their trees. As the trees reached the middle ground and background, the trees become lighter in value. The third trick that we discussed was that as the trees receded in space, the trees became higher on our paper.  This painting required a lot of thought as students needed to consider those three items (value, size, and placement) as they painted their trees in the winter landscape.


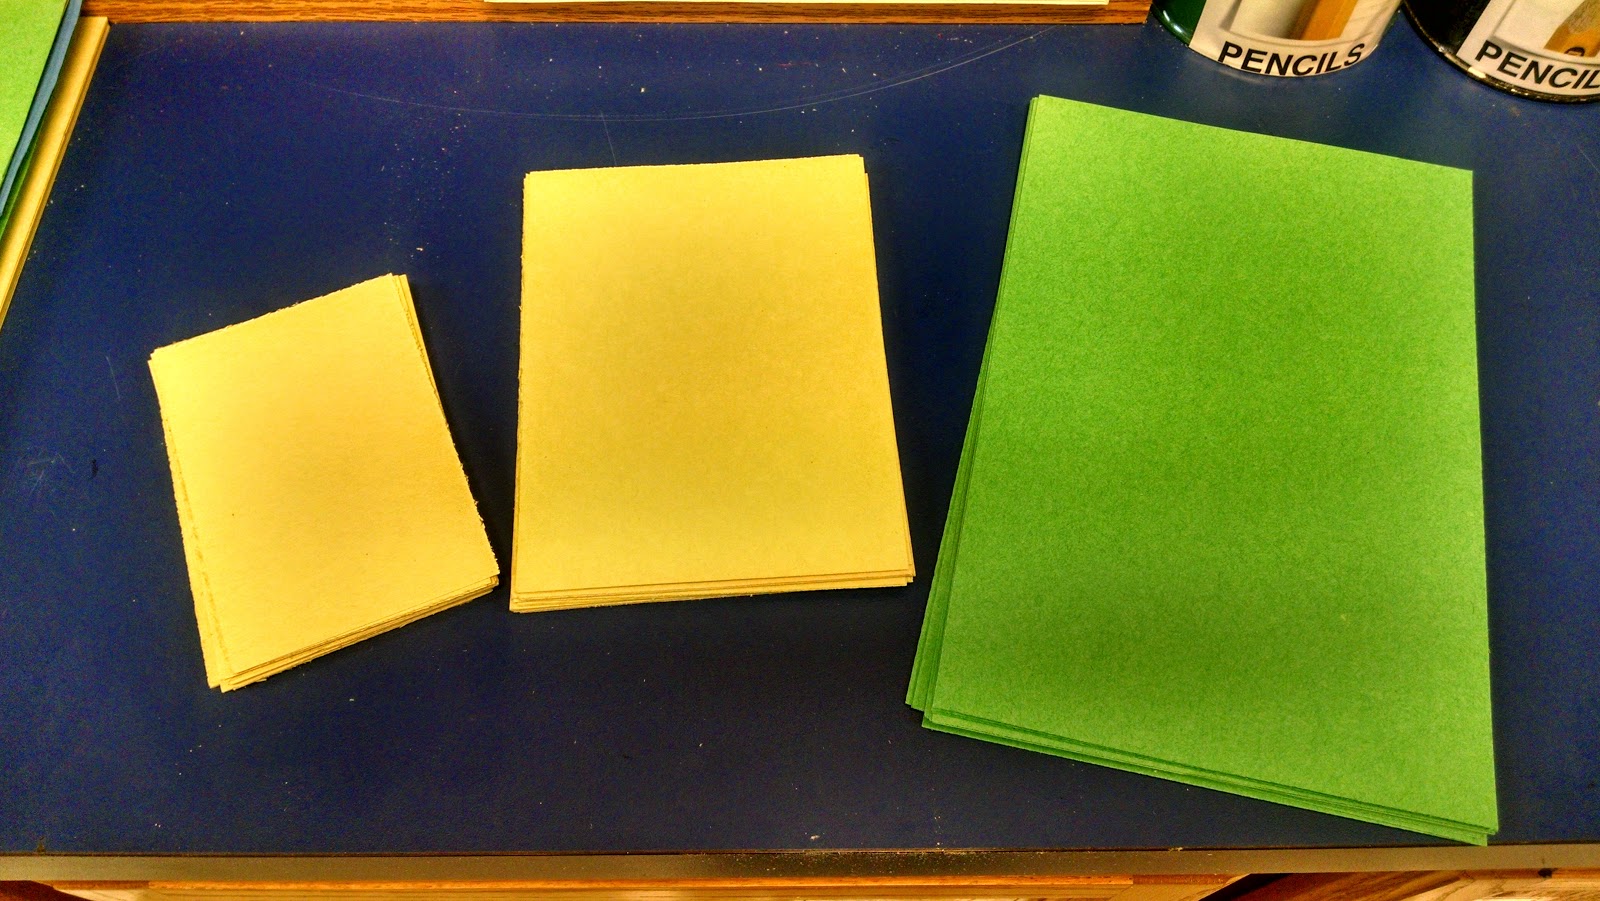
Kindergarteners, instead of painting their trees, are cutting their trees from three different sizes of construction paper; small, medium, and large. The trees will be decorated with crayons and glued in the appropriate area of space within their winter landscapes; large trees in the foreground, medium trees in the middle ground, and small trees in the background (5 trees total). Using the rectangle paper, students made a dot at the top of their rectangle in the center of the paper, draw two straight lines down from the dot in the center to the corners at the bottom.  After cutting on the lines to make their triangle, each child made sure their names were on the back so as not to get their trees mixed up with someone else's at their table section. The trees are stored in their table section's drawer and will be decorated next time with construction paper crayons.


As we are working on our landscapes, we constantly refer back to Grant Wood's and Pieter Bruegel's landscapes to see how these artists, even though centuries apart, are still using similar techniques to create the "illusion of space" (objects up close and far away).


Wednesday, November 5, 2014

"The Illusion of Space" Activity

I tell my students all the time that artists use little tricks to create illusions in their art, such as creating an illusion that objects are up close and far away. By simply learning about these little magic tricks that artists' use, my students can also make their art appear to have the "illusion of space". This month's focus is the "Illusion of Space" and my little artists can make objects appear up close or far away by simply changing the value, location and size of objects in our landscapes. My SLO (Student Learning Objective) for this school year actually connects to the "Illusion of Space":

95% of students from sections 2B and 2C will identify and demonstrate the illusion of space using specific art vocabulary: foreground, middle ground, background, horizon line, placement on paper (high/far and low/near) and size relationships (near/large and far/small).

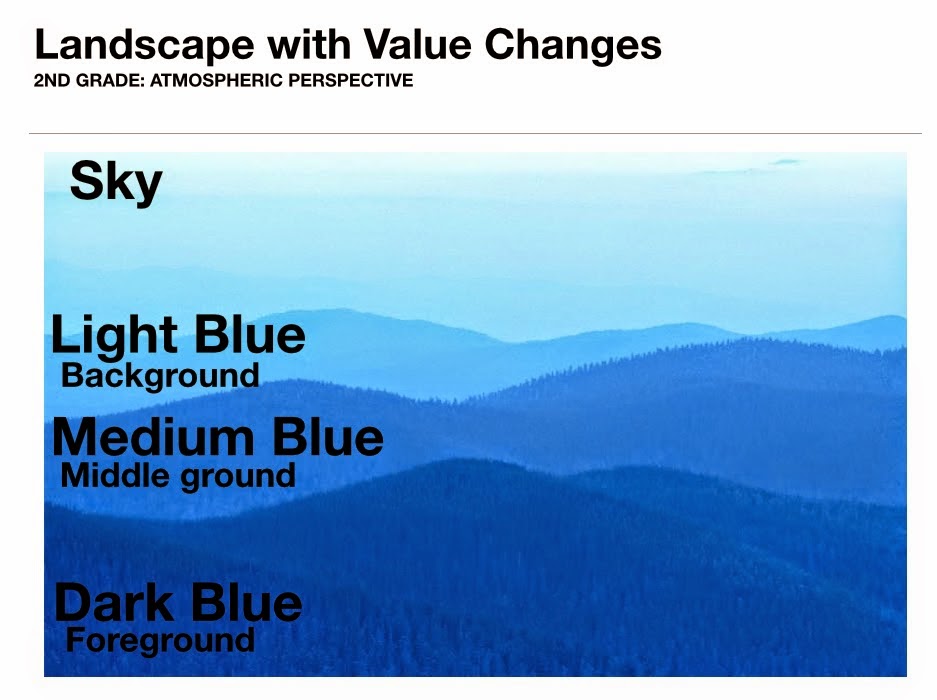
Today and tomorrow, 2nd graders will be playing a little "space" game to help identify the areas of space using the objects below. The objects need to be organized according to how artists create space in a landscape using value and size relationships. The large blue rectangle shapes are the foreground, middle ground, and background areas of space while the large, medium, and small tree should be overlapping the appropriate area of space; large tree on dark blue foreground, medium sized tree on medium blue middle ground, and small tree on light blue background.


The first graders and kindergarteners used the same shapes for a quick activity, but instead of working in pairs like the second grade group, I made two landscape boards on large 18 by 24 inch paper. On the large paper, I drew three lines and wrote the words foreground, middle ground, background, and sky to separate the areas of space.

Words on the left from bottom to top; foreground, middle ground, background, and sky.
Each child was assigned one of the six objects from above and asked to assign it to the appropriate area of space. The class was divided in half with half the class working on each board.  Students worked together to make sure each object was in its appropriate area of space according to what we just discussed about space; Objects in the foreground are larger than objects in the background (relative size), objects in the background are higher than objects in the foreground (position on the picture plane), and objects in the background are lighter than objects in the foreground (atmospheric perspective).
Some students thought blue was for sky, but were reminded that it was our ground color.
Kindergarteners working in groups of 8-10 students.


We looked at many examples of landscapes before completing this quick "space" activity. One of the pictures I used during my introduction was a landscape of blue hills at dusk. When students forgot that the blue rectangles were ground and assumed the pieces were part of the sky, I reminded them of the landscape from the introduction.

We also made a connection between Pieter Bruegel the Elder's "The Hunters in the Snow", painted in 1565, to Grant Wood's "Stone City, Iowa", created in 1930. Both are landscapes and both artists (although from different centuries) still used the same "space" skills we discussed to make parts of their paintings appear up close and far away.

Here are few quick videos (and when I say quick, I mean less than one minute) that I used as a resource to help demonstrate the "illusion of space" in art. I usually explain what to watch for within the video before even playing it, let them watch the video in its entirety, explain the items again to look for a second time, and replay the video a second time to maximize its effectiveness. There are other quick videos for the design elements and principles in the "Artist's Toolkit" to explore. My students love the quick videos because they have music and sound effects! I love the videos because they quickly and precisely teach an art skill!

http://www.artsconnected.org/toolkit/watch_space_overlap.cfm
http://www.artsconnected.org/toolkit/watch_space_perspective.cfm

SD Visual Arts Standards:
Anchor Standard 3: Refine and complete artistic work.
K.VA.Cr.3.1 Explain the process of making art while creating art.
1.VA.Cr.3.1 Use art vocabulary to describe choices while creating art (such as the elements and principles of design).
2.VA.Cr.3.1 Discuss and reflect with peers about choices made in creating artwork using art vocabulary (such as the elements and principles of design).

Anchor Standard 1: Generate and conceptualize artistic ideas and work.
1.VA.Cr.1.1 Engage in creative art making using observation and investigation.
2.VA.Cr.1.1 Brainstorm and implement multiple approaches, materials, and tools to solve an art or design problem.


Monday, November 3, 2014

Visual Thinking Strategies in the Early Elementary Art Room

This week's lesson allows all students kindergarten through second grade to examine Pieter Bruegel the Elder's "Hunter's in the Snow" painted in 1565 using Visual Thinking Strategies. One of my goals as an art educator is to get students talking about art and drawing their own conclusions from art finding visual evidence within the work. Visual Thinking Strategies (VTS) allows each child to share what they see or find in a piece of art and connect their findings to visual evidence within the painting. Through VTS' rigorous group 'problem-solving' process, students cultivate a willingness and ability to present their own ideas, while respecting and learning from the perspectives of their peers.  Common questions asked during a VTS discussion include: 

What's going on in this picture?
What do you see that makes you say that?
What more can we find?

Pieter Bruegel the Elder, "Hunters in the Snow", 1565
We have come to believe that discussions of art may be one of the most fertile grounds for teaching critical thinking skills precisely because there is no one right answer.
—Abigail Housen

For more information about Visual Thinking Strategies (VTS), visit vtshome.org.

SD Visual Arts Standards
Anchor Standard 8: Interpret intent and meaning in artistic work.
K.VA.Re.8.1.a. Describe what an image represents.
1.VA.Re.8.1.a. Compare images that represent the same subject.
2.VA.Re.8.1.a. Categorize images based on expressive properties.

1st and 2nd Grade Venn Diagram Activity