Showing posts with label Green Screen. Show all posts

Monday, February 20, 2017

Landscape Newscasts

I finally finished loading all the green screen landscape news reports to four movies, one movie for each 2nd grade section. Students are so excited to finally have their videos on YouTube. For this project, students were divided into groups of four to five students, together they were assigned one landscape from two artists; Grant Wood or Peiter Bruegel the Elder, and wrote a script before recording their video. Their script needed to include the following descriptions; horizon line, foreground, middle ground, background, overlapping, placement, size, and value. See my previous post explaining this project.

2A Landscape News

2B Landscape News

2C Landscape News

2D Landscape News

Wednesday, January 18, 2017

Breaking News: It's all in the Landscape!

Second graders are using DoInk's Green Screen iPad app to create a news report on art vocabulary relating to space (the design element in art not the physical universe beyond the earth's atmosphere). Students examined landscapes from two artists; Pieter Bruegel the Elder (Netherlands) and Grant Wood (Iowa). Students are working in small groups to create their news report. 


First step, examine a landscape painted by Grant Wood or Pieter Bruegel from one of the landscapes below. Step two, develop a skit and designate speaking parts as they would see in Reader's Theatre by writing Character’s Name, then colon or dash and finally speaking part. In the script, students must include the following art vocabulary; foreground, middle ground, background, overlapping, value, size, placement, and horizon line. Students must include the artist's name and year painted. 
Pieter Bruegel the Elder, Winter Landscape with a Bird Trap 1565
Grant Wood, Young Corn 1931
Grant Wood, New Road 1939
Grant Wood, Fall Plowing 1931
Pieter Bruegel the Elder, The Harvesters 1565
We also discussed how every great story needs a beginning, middle and end. Once groups have completed their scripts and assigned a camera person, their group may begin filming with the iPad using the DoInk Green Screen App. The landscape assigned to that group will be displayed behind the "Newscasters" onto the green screen as they point out the important information and vocabulary the group discovered while writing their script.
Script Checklist

Thursday, January 28, 2016

Norman Rockwell Tells Stories using Images!

Norman Rockwell's process of creating an image is very similar to directing a scene in a movie. In this 2nd grade lesson, students relate Rockwell's images to the basic elements of a story including setting, character, and plot. Second graders will be using these same elements to tell their own visual story in one photograph. To inspire students, we examined the many photographs that Norman Rockwell hired as resources for his illustrations. Did you know that almost all of his paintings began as photographs?
Norman Rockwell"s Photographic Eye by NPR
Using a planning worksheet, students worked in groups of 3-4 at their table sections. A word list was provided to help choose elements for their setting, objects (to assist in storytelling), and characteristics. Groups drew a simple storyboard and a brief description explaining what will be going on in their photograph (plot).
Smithsonian American Art Museum Teacher's Guide page 56

Storyboard
Next week, students may need to bring objects from home to help with their storytelling or choose from available items in the art room if appropriate. Once their idea is planned, one student assigned as photographer (from each group) will use the camera app on the iPads to photograph their group in front of a green screen for a still frame photo expressing their planned story while the rest of the group pose and act as characters within the scene. An image from the internet will be saved to the iPad and used as the backdrop (setting) to replace the green screen and appear as if they are truly within their setting. Here is a great tutorial on how to use the Do Ink "Green Screen" app from a classroom teacher in Norfolk, Nebraska. Do Ink "Green Screen" will be the app we use for this project.


Splatter Paint, Norman Rockwell and Green Screen!

When reading the title to this post, you are probably wondering what any of these things have in common! Last week, students examined Norman Rockwell and his illustrations using VTS. In a previous class, a Venn Diagram was used to compare Norman Rockwell's art and Modern Artist Jackson Pollock's art (born only a few years apart). Of course, students had a difficult time finding any similarities, but recognized many differences between the two artists. After examining both artists, first grade students then took a closer look at "The Connoisseur" by Norman Rockwell and noticed an amazing combination of both art forms.
"The Connoisseur" by Norman Rockwell 1962
This week, first grade students created their own splatter paint project on small 4.5" x 6" pieces of white or colored paper. Next week, students will be photographing their splatter paint project and using a green screen to put themselves in an image examining their own art. Do Ink offers a great app to create this kind of art idea. Students are very excited to use the iPads to embellish their handmade creations.

After photographing their art and asking a friend to photograph themselves facing the green screen with the camera app on the iPad, students will have the opportunity to choose from the following five backgrounds to add to the middle layer within the green screen app.


Once in the app, students will create a new project by selecting the plus sign in the top right corner and choosing "Create a New Project". This will open a new project. In the picture below, you can see students will be using all three layers within the app to create their image. By selecting the plus sign in the middle layer at the bottom of the screen, students can pick one of five frame images from above for their project.

The very bottom layer will be used for their splatter paint image. The image can be cropped and the size changed as long as students have selected that image at the bottom of the screen. We will know the image is selected when there is a red box around that layer's picture. The splatter painting should fit within the frame without any background showing.
The last image added is the photo of themselves facing the green screen. This image will be the very top of our final image. Students are most amazed with this step, because the green screen magically disappears and is replaced with the wall and frame backdrop. While the layer with the photo of themselves is selected (red box around layer), students can alter their size and location as well as reduce and increase the sensitivity of the green screen to prevent a green halo haze around their body.

To export their images, students will select "Image" next to "Save" and select "Save" to export image to the Camera Library on the iPad. These final images will be uploaded to Artsonia for their family to see. Click here to see the student created images.


Wednesday, June 3, 2015

Stop Motion and Animation Apps for iPad

I have received many questions about the stop motion and animation apps I use in the elementary art room at my school. I wanted to give a list of the top four applications that I have used this last school year.

#1 iMotion by Fingerlab

iMotion is a time-lapse and stop-motion app for iOS.  You can take pictures, edit your movie and export 1080p & 720p HD videos to your device or to Youtube. Time-lapse is a technique which accelerates movement. It can be used to photograph cloudscapes, plants growing, crowds... Stop motion is an animation technique which makes a physically manipulated object look like it’s moving on its own.  An iPad tripod may be necessary to keep the camera function stable and prevent a shaky movie when creating stop motion animations. A free trial version can be downloaded, but you can upgrade to the full version for $2.99.


#2 Animation & Drawing by Do Ink

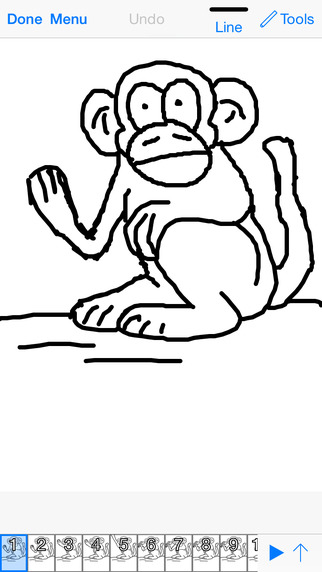
This is a fun and creative app to make animations on your iPad. The app was designed to be easy for beginners and young animators. Second grade students at West Central used this app to animate our Alien invasion of the art room. Use the drawing editor to create vector artwork and frame-by-frame (flip book) animations. Use the composition editor to combine your artwork, along with props from the Do Ink prop library, into more complex scenes. Save to the camera roll, then share your creations. This app is a little more expensive with a cost of $4.99 per download, but you can purchase the "Creativity Bundle" by Doink for $5.99 and gain access to the "Green Screen" app used with our landscape news reports.

#3 Stop Motion in iMovie (Mac)

Although not currently on iPad, but available on MACs. This is the software I use most often for stop motion animations. iMovie is packaged for free with all new iMacs as of 2003 and can very easily do the job of stop motion animation, even if it wasn’t designed specifically for stop motion. All the features are there (sound, music, image duration, etc.) and great results can be teased out of the software. Speaking from experience, you’ll want to look for the latest tutorial online since the interface can (and does) change dramatically with each update.


#4 Easy Animate by Woodland Boys Software

Easy Animate makes it simple to draw and create animations. This is a free downloadable app developed by a teenager. Isn't that awesome! This app offers several choices of frames per second rates and onion skinning and is very easy to use for even young ages. The recent updated version fixed many glitches, so hopefully it works smoothly now without any freezing issues.


Tuesday, April 21, 2015

News Report on Landscapes (continued)

I finally finished loading all the green screen landscape news reports to one movie. Students are so excited to finally have their videos on YouTube. For this project, students were divided into groups of 2 to 3 students, together they chose one landscape from two artists; Grant Wood or Peiter Bruegel, and wrote a script before recording their video. Their script needed to include the following descriptions; horizon line, foreground, middle ground, and background. We used the following planning sheet to write our scripts. See my previous post explaining this project.

My students really enjoyed this project, because they were the ones in charge and of course, because they made a movie! I hope you enjoy it as much as we did making it.

Monday, March 2, 2015

News Report on the use of space in a landscape

Second graders are using DoInk's Green Screen iPad app to create a news report on art vocabulary relating to space. Fall Semester, students examined two landscapes; Pieter Bruegel the Elder's "Hunters in the Snow" and Grant Wood's "Stone City, Iowa". Students are working in small groups to create their news report. First step, choose a landscape painted by Grant Wood or Pieter Bruegel from the landscapes below. Step two, develop a skit and designate speaking parts by writing Character’s Name, then colon or dash and finally speaking part. In the script, students must include the following art vocabulary; foreground, middle ground, background, and horizon line. Students must include the artist's name and year painted.
Pieter Bruegel
The Harvesters 1565

Pieter Bruegel
Landscape with the Parable of the Sower 1557

Pieter BruegelWinter Landscape with a Bird Trap 1565
Grant Wood Young Corn 1931

Grant Wood Near Sundown 1933

Grant Wood New Road 1939